
Summer is getting intense, and it is necessary to know about that how to recharge car ac? And check if your AC needs to be recharged and remember your car’s AC may have decreased refrigerant levels or a leak.
So, when your car blows less cool air or blows hot air instead of cool air after you turn on your AC, it is essential to recharge it. Recharging your car AC at home is now possible if you read this blog attentively and thoroughly. The mechanic guide will help you in all troubleshooting related to your car.
Signs your Car Needs an AC Recharge
Refrigerant is the key component in keeping your car cool in scorching heat. Problems like low cooling or leaks may require you to refill it. But how can you tell that your car needs an AC recharge? For that, you need to observe these symptoms closely…
Blowing Warm Air
It is a common sign if your car is not blowing cool air but hot. This indicates that your car’s refrigerant levels are extremely low.
Weak Airflow
Low air throw from the vents is a sign of a poorly performing AC system in your car. It indicates that your car’s AC system needs to be revitalized.
AC Clutch Not Engaging
The AC compressor clutch may fail to work if the refrigerant level is low or empty. When the compressor clutch is not functioning properly, you will experience zero cooling effects from your AC.
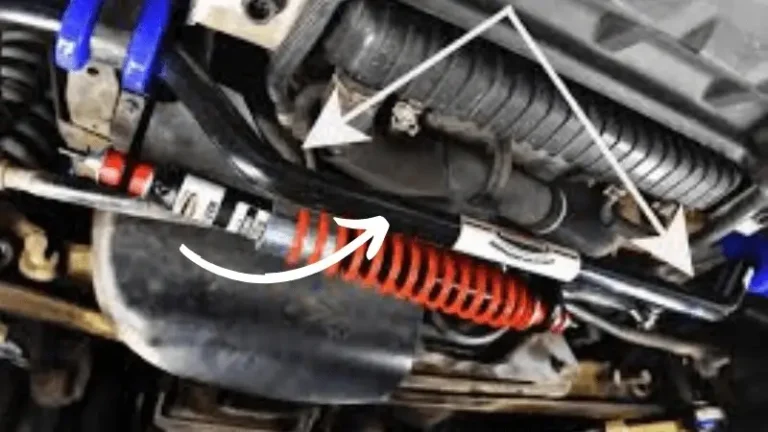
Visible Refrigerant Leaks
Open your car’s hood and observe the components of the AC system. If you notice a greasy-type substance around them, it means your AC system is experiencing refrigerant leaks.
Equipment Required on How to Recharge Car AC
The AC refilling process requires you to have the necessary tools. Without them, it would be futile to recharge the AC refrigerant in your car. These tools help you achieve perfect cooling results in your AC, and each tool matters a lot. Let’s see what equipment you need to have.
Refrigerant (R-134a)
Check inside your car’s hood or refer to the user manual to determine the type of refrigerant your car needs. Use only the refrigerant type recommended in your car manual. Usually, modern cars use R134a refrigerant for the AC system.

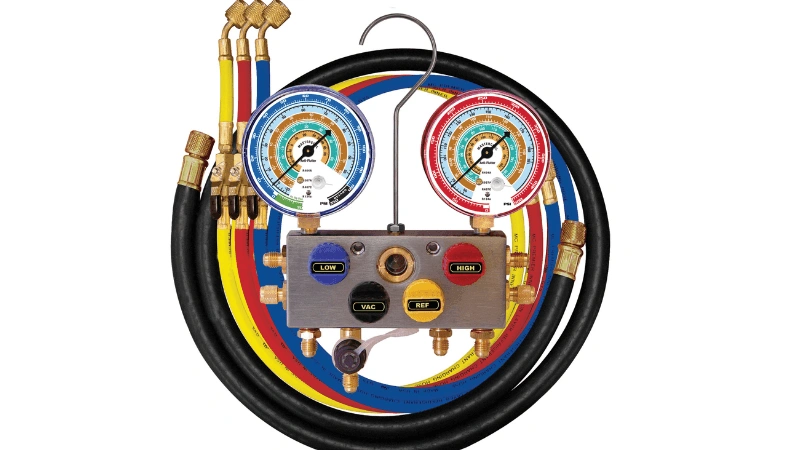
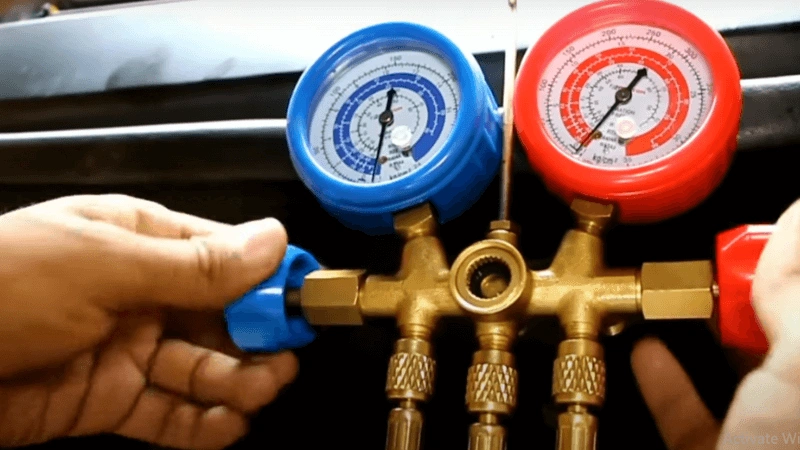
Manifold Gauge Set
It provides readings of the low and high pressure of the refrigerant, helping to determine whether your AC system has any leaks.
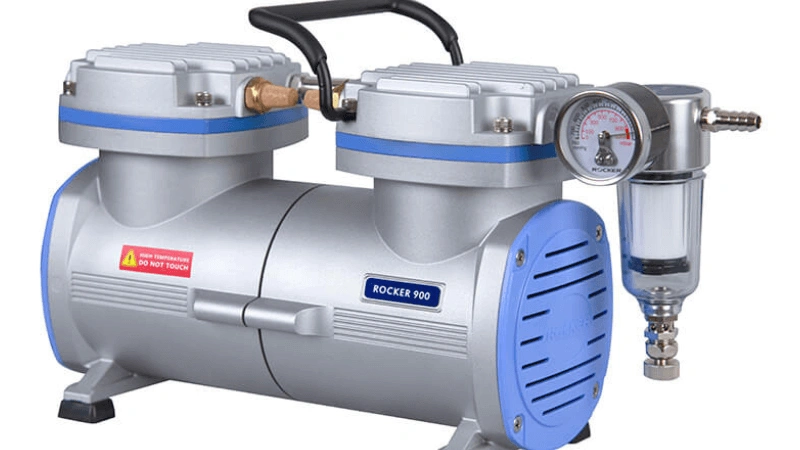
Vacuum Pump
It removes air and moisture from the AC system because the presence of gases like nitrogen or carbon dioxide in the AC tubes affects the refrigerant’s cooling capacity. Therefore, it is necessary to vacuum the system, which is why this vacuum pump device is used.
Protective Gear
Safety apparatus is necessary for you to use. Wear safety glasses and gloves to protect yourself from any damage during the process.

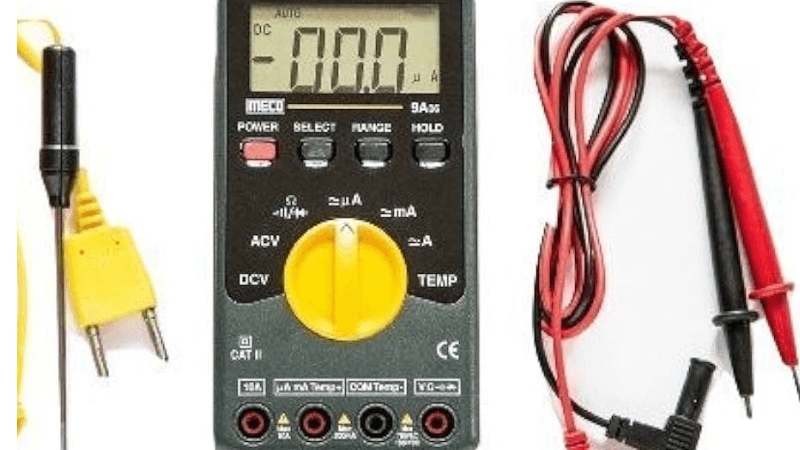
Digital Multimeter
Use a digital multimeter to check the temperature of the cool air blowing out from your AC vents.
Step-by-Step Guide to Recharging Your Car’s AC
Here are the easy steps to guide on how to recharge car ac:
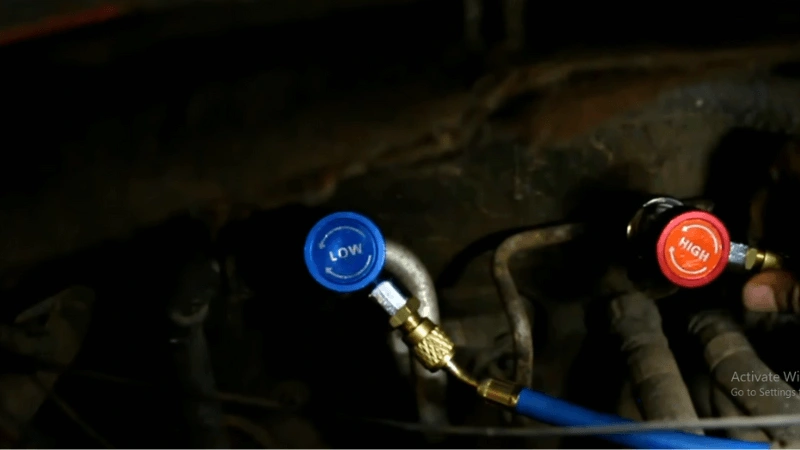
Connecting hoses of the AC manifold to the valves
Open your hood and search for the high-pressure valve, usually marked with “H,” and the low-pressure valve, usually marked with “L.” After locating them, connect the blue hose of your AC manifold to the low-pressure port and the red hose to the high-pressure port. After securing the valves with the hoses, make sure you have turned the caps of the hoses off.
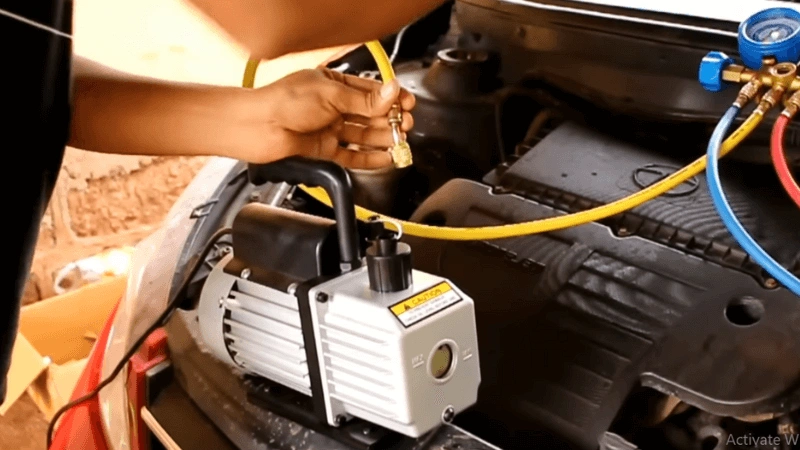
Vacuum out gases from the AC system
In the AC system, nitrogen and other gases can enter, so you need to vacuum them out. To do this, use a vacuum pump. Connect the manifold’s yellow hose to the vacuum pump and turn it on. Then, open the red and blue valves on the manifold. This process creates a vacuum in the AC system.
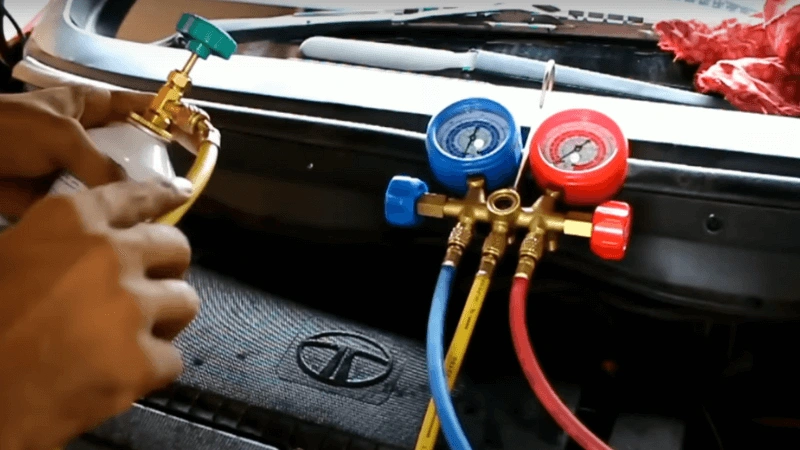
Connect Refrigerant Can to Manifold
Connect the refrigerant to the yellow hose of the manifold and keep it upright. There is no need to turn it upside down.
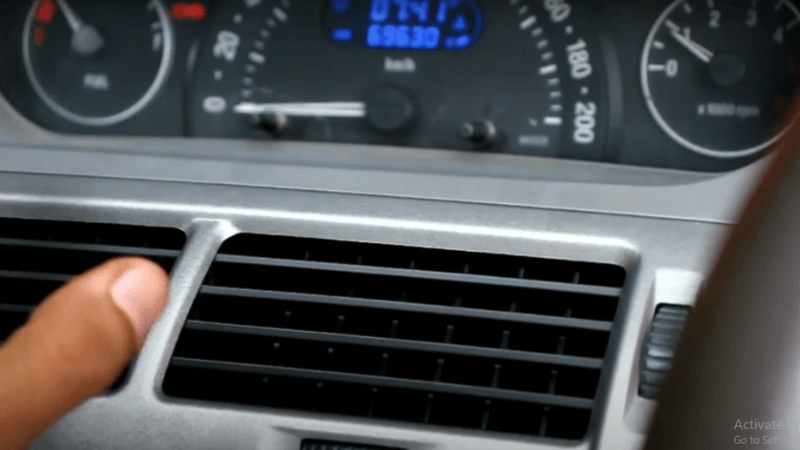
Set the AC to its Coldest Level
Now, start your car and turn on the AC. Set the temperature to the lowest level and wait for it to cool down. Then, note the lowest temperature of the car’s AC with a multimeter.
Open the LP valve
Now, gently open the valve of the LP. You will notice that the manifold gauge starts showing a reading. There is no need to open the valve completely. Do not open the HP valve. The manifold gauge will show the reading. Keep the pressure at 50.
Check Pressure Readings Based on Ambient Temperature
Check the current surrounding temperature outside the car and note it down. Your high-pressure (HP) and low-pressure (LP) readings should match the ambient temperature. You can refer to the chart that provides ambient temperature values along with the corresponding HP and LP readings.
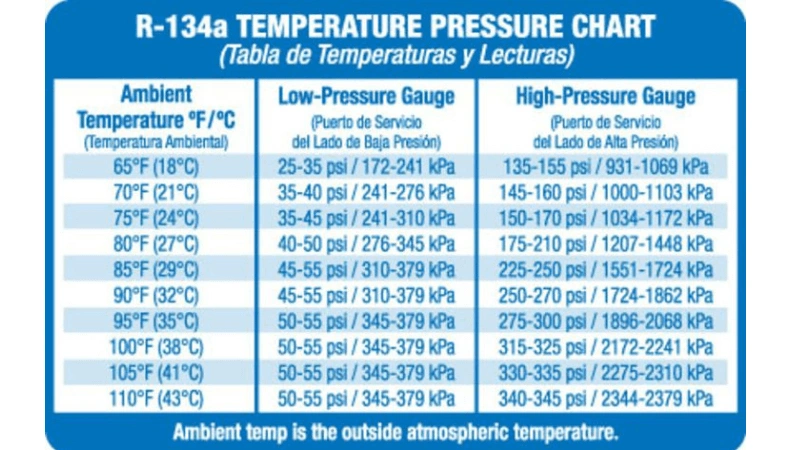
If the ambient temperature is 30°C (86°F), then:
- The low-pressure (LP) gauge should show a reading between 35 and 45 psi.
- The high-pressure (HP) gauge should show a reading between 175 and 210 psi.
Note: If your AC system’s LP and HP readings do not align with the ambient temperature, it may indicate issues like low refrigerant, a clogged expansion valve, or a faulty compressor.
Remove the AC Manifold
Check cabin temperature to ensure desired cooling level. If the cooling is sufficient, it’s time to disconnect the refrigerant. First, turn off the valve before removing the refrigerant connection. Then, carefully turn off both the high-pressure (HP) and low-pressure (LP) valves located in the hood.
After that, securely place the caps back on the valves to prevent any debris from entering the system. Finally, store your manifold kit in a safe, dust-free place to keep it in the best condition for future use.